 By Miles Sinclair
Updated November 2026
A small solar panel kit canada buyers can rely on is usually a compact set of one or two panels, a charge controller, wiring and mounting hardware. With the right sizing and a clear picture of your sun exposure, you can use one to charge batteries for lights, small electronics or a shed. This guide walks through the steps so you can match a kit to your actual needs.
Step 1: Decide What the Kit Needs to Power
Start with a list of devices and how many watt-hours each uses per day. A phone charger, a few LED lights and a small fan add up quickly, so write down the wattage and hours of use for each. Multiply watts by hours to get watt-hours per day, then add 20 to 30 percent as a buffer for cloudy days and battery losses.
Shopping for one? See our guide: Small Solar Panel Repair: 3 Best Kits for Pool Heaters and Small Panels.
If your loads are very small, a kit built around a 12-volt battery and a panel in the 50 to 100 watt range is often enough. For a larger list, read Solar Panel Kit for Small House: 7 Steps to Pick the Right Setup for a sizing approach that scales up.
Step 2: Check Your Sun Exposure in Canada
Canadian sun hours vary widely by province and season. Southern Ontario and the Prairies receive noticeably more usable sun than much of the Maritimes or the Pacific coast, and winter output drops sharply everywhere north of the 49th parallel. Panels also lose efficiency in cold weather and under snow, though cold air can help them run at a slightly higher voltage.
Plan for the worst month you will actually use the system, not the summer average. Tilting a panel toward the south at an angle close to your latitude, and adjusting it seasonally if practical, improves winter output. For a broader overview of what small systems can deliver, see What Can a Small Solar Panel Power? A Practical Guide for Beginners.
Step 3: Match the Kit Components
A basic kit includes four parts, and each needs to agree with the others:
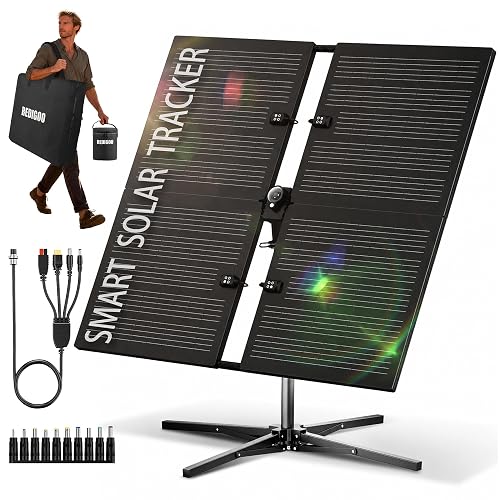
- Panel(s): Confirm the wattage and that the voltage suits your charge controller.
- Charge controller: Use a model rated for the panel’s current and your battery voltage, typically 12 volts for small kits.
- Battery: A sealed or lithium battery sized to hold at least a few days of your daily load.
- Mounting and wiring: Weather-rated cable, MC4 connectors, and a mount that can handle wind and snow loads.
Check that the charge controller supports the battery chemistry you choose, since lithium and lead-acid batteries need different charging profiles.
Step 4: Mount and Wire the System Safely
Mount panels where nothing shades them during peak sun hours, and keep wire runs short to limit voltage drop. Use a fuse or breaker between the battery and the controller, and keep batteries in a ventilated, temperature-stable spot. Canadian winters can damage batteries that are left discharged or charged in freezing conditions, so check the battery’s temperature limits before installing it in an unheated shed or vehicle.
If you are connecting to a home electrical system or working on a roof, consult a licensed electrician. Mistakes with grid-tied or high-voltage wiring can create fire and shock hazards.
Common Mistakes to Avoid
- Sizing the kit on summer sun hours only, then running short in December.
- Pairing a panel with a charge controller that cannot handle its current.
- Skipping fuses, or using undersized wire over a long run.
- Mounting panels flat on a shed roof where snow sits for weeks.
- Charging a lithium battery below freezing unless the battery is rated for it.
Recommended Gear
- A quality MPPT charge controller: It extracts more usable power from cool or low-light panels than basic controllers. View on Amazon
- An adjustable panel mount: Lets you tilt the panel toward the sun as the seasons change. View on Amazon
- Weatherproof MC4 solar connectors and cable: Keeps connections sealed against moisture and cold. View on Amazon
FAQ
Will a small solar panel kit work in a Canadian winter?
It will produce power, but output drops significantly in short days and under snow. Size the kit for winter loads and clear snow from the panel when it is safe to do so.
How many panels do I need for a small shed?
Most small shed loads, such as lights and a small fan, run well on one panel plus a battery. Calculate your daily watt-hours first, then choose the panel wattage to match.
Do I need a permit to install a small solar kit in Canada?
Off-grid kits for sheds or cabins usually do not, but rules vary by province and municipality. Check with your local building authority and consult a licensed electrician before connecting anything to your home wiring.
Conclusion
A small solar panel kit in Canada works best when you size it to your winter needs, not your summer ones. Start with a clear list of loads, check your sun exposure, and make sure each component matches the rest. Take safety seriously and consult a professional for any connection to your home electrical system.
Related reading
Ready to choose one?
About Miles Sinclair
Miles Sinclair is part of our editorial team and reviews and edits our small-scale solar guides, checking product details against manufacturer specifications and owner feedback.